In this article we put on a record and go through the components of a record player step by step to gain a common understanding of the anatomy of a turntable. This is a basic understanding, so we will leave the detailed consideration of some components for later.
The plinth
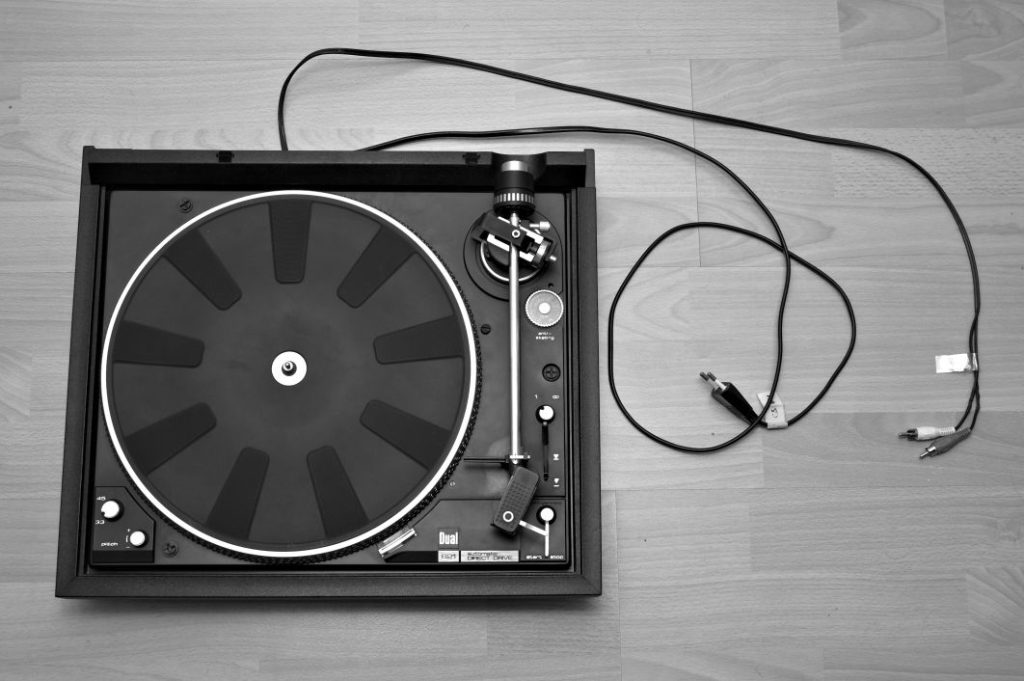
The plinth is the outer casing in which we handle and place the turntable. It contains the actual system (a.k.a the chassis) and decouples it from structure-borne noise (also called “rumbling”, for example, if your neighbor is secretly experimenting with explosives again or the speakers couple too much vibration into the floor / shelf). The record player’s cartridge picks up this noise and superimposes it on the desired signal (your favorite record), which of course we want to avoid as much as possible. Therefore, the plinth usually stands on sound-absorbing feet and often contains the chassis in the plinth via springs. Common materials are wood, acrylic or, in my case, plain plastic.
In the first step, we place the record player in a sturdy, level place that is as free from vibrations as possible. With a spirit level on the turntable we can ensure that the turntable is actually level.
The cables
The cables are often overlooked when you think about the anatomy of a turntable. For this reason and because they fit well here in order, we’ll go into them right at the beginning.
Power cord
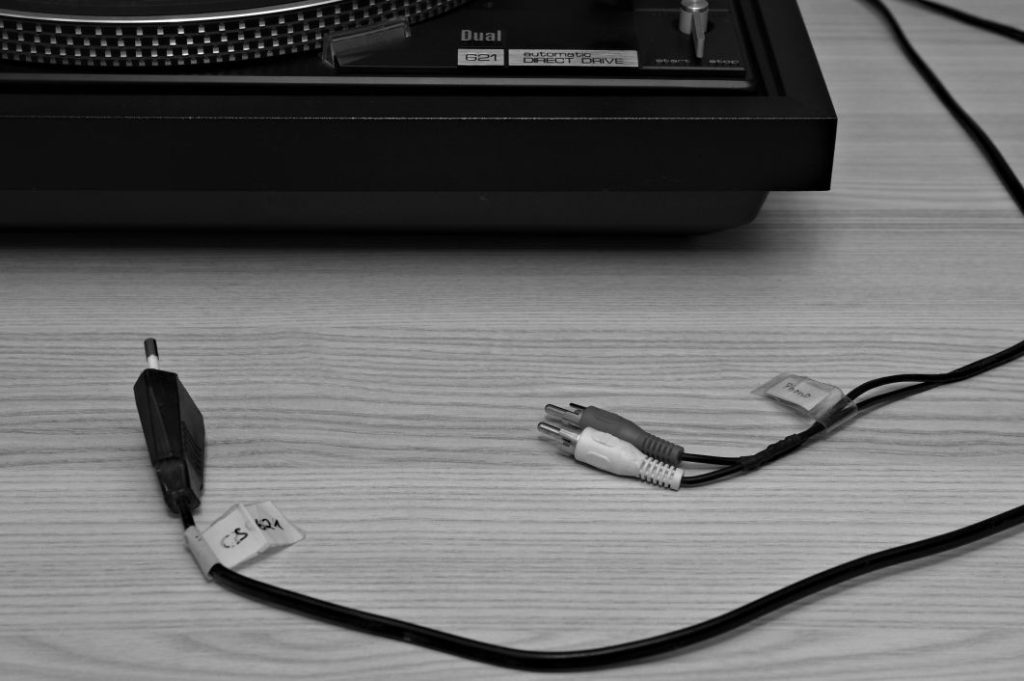
A record player requires some electrical energy to spin the record. That’s why it has a power cord that connects it to a power outlet. Depending on the country, the power plugs may look different. For example, my record player has a European plug.
We obviously plug the power cord into the socket to operate.
Phono output
To transmit the electrical signal to an amplifier, the turntable has either jacks or a cable. Older turntables sometimes have outdated plugs. In my case I replaced the original DIN plug with a commonly used RCA plug.
We connect these plugs to a suitable amplifier. Since the signal from a record player needs specific equalization and has a very low level, we need a suitable input for this. You can choose between the phono input of an amplifier and a dedicated preamplifier. Some enthusiasts believe that even the worst external preamplifier is better than an amplifier’s built-in phono stage. Personally, however, I strongly doubt this claim.
Turntable platter
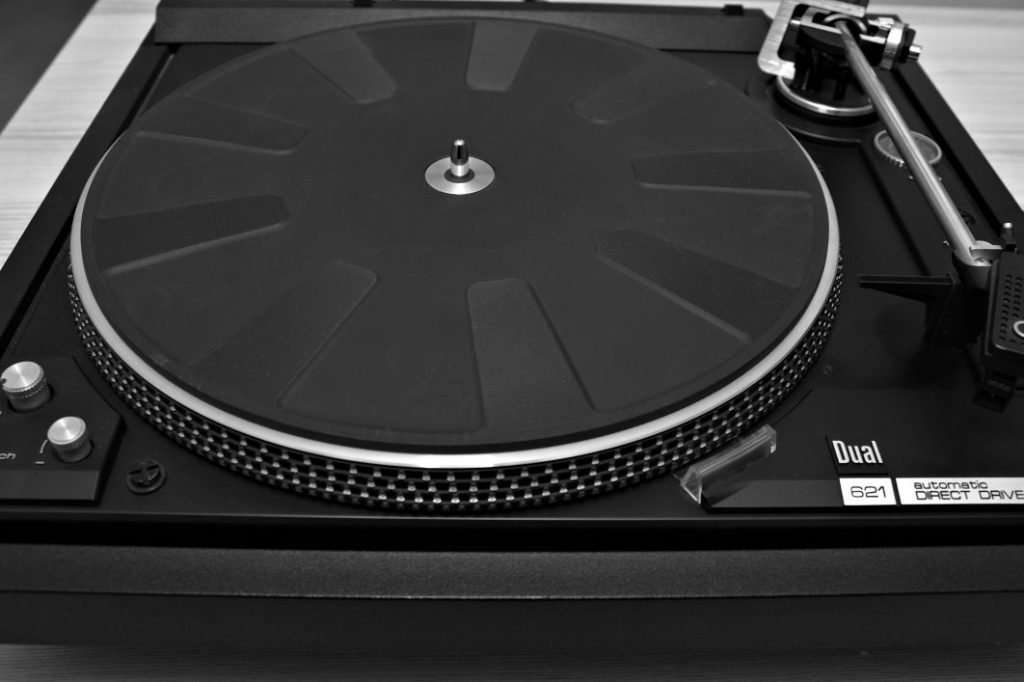
In this section we’ll look at probably the most noticeable part in the anatomy of a turntable. The platter is the rotating disk from which the turntable gets its name. It rotates clockwise and with it the record lying on it, so that the cartridge can scan the groove.
Platter mat vs. Slip mat
Since the platter is usually made of metal such as aluminum, a mat protects the record from scratches. In HiFi turntables, this mat is often made of rubber, so the platter can rotate the record safely and does not slip. In contrast, DJs want to use exactly this effect when scratching, which is why these mats are often made of felt, which is soft and allows the record to slip easily (hence their name “slip mat”).
Center spindle
As the name suggests, the center spindle is located in the center of the platter and its diameter fits exactly into the center hole of the record. This ensures that our record runs exactly concentrically and doesn’t wobble, which in turn would result in a wobbly sound. So to play a record, we guide its center hole exactly over the spindle and gently guide it onto the mat. To make it easier for us to put the record on, the spindle is tapered towards the top.
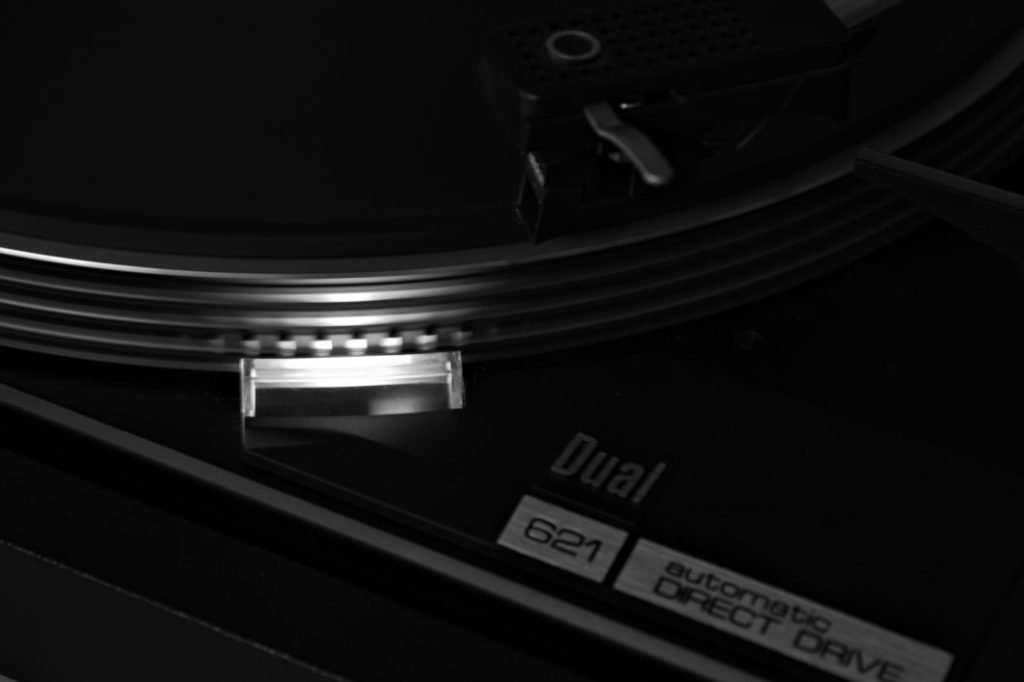
Strobe dots
The strobe dots are located on the outer circumference of the platter and are illuminated by a stroboscopic light. The frequency of the stroboscope and the distances between these dots give the impression at certain speeds that the dots are standing still. If the platter rotates too quickly or too slowly, the dots move either clockwise or counterclockwise. Most turntables can rotate the platter at 33 and 45 rpm, which is why there are at least two different rows for this. Older turntables simply use the mains frequency (see power cord) for the stroboscope, which is why there often are a total of four rows: one row for a mains frequency of 50Hz and 33 rpm, one row for 50Hz and 45 rpm, one row for a mains frequency of 60Hz and 33 rpm and one row for 60Hz and 45rpm.
Spin the turntable
Manual turntables usually have a dedicated switch to turn on the platter. With semi- and fully automatic turntables (like in my case) you simply tap the lever on “play”. The record player then first starts spinning the platter and then places the stylus at the beginning of the record.
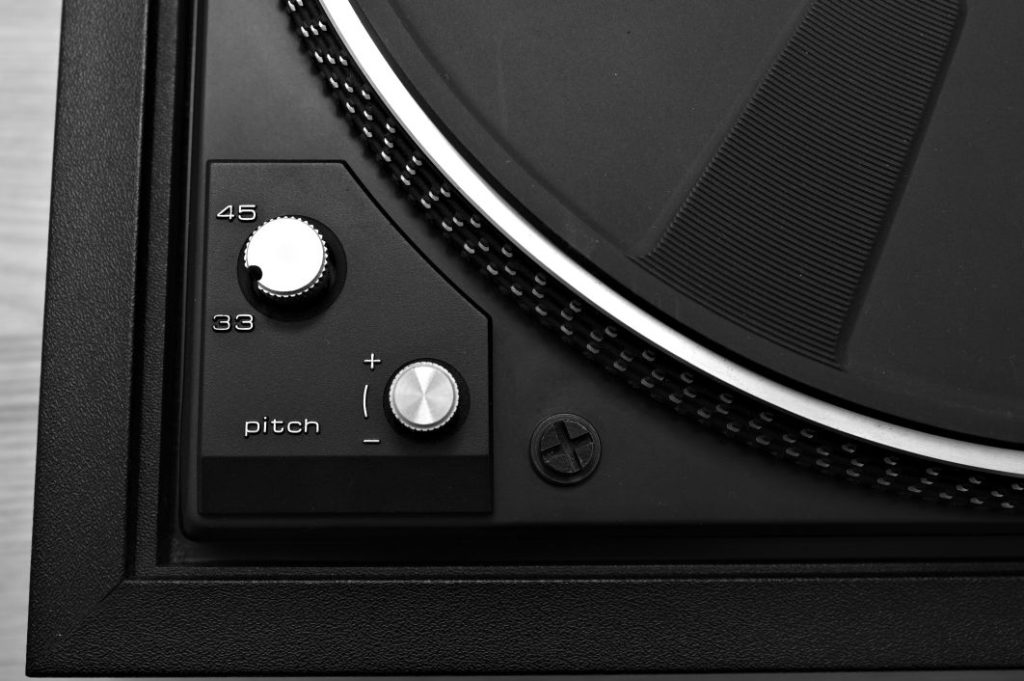
Set the speed
Depending on the record you select, you will need to adjust the speed accordingly. LPs (12″) typically run at 33 rpm and singles (7″) at 45rpm. A decent record player has at least these two speeds to choose from and controls them via the drive. You can usually make fine adjustments using the pitch control and the strobe dots.
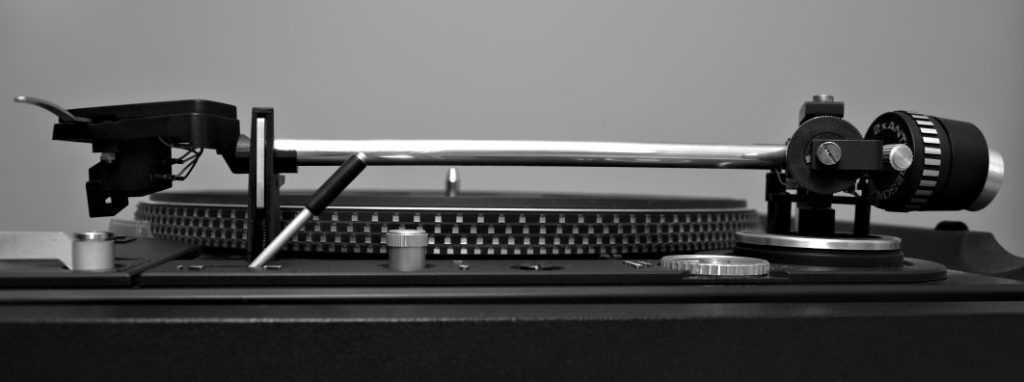
Tone arm
In the last chapter of the anatomy of a turntable we will explore the tonearm and the cartridge. When you look at a record, you might think that there are hundreds and thousands of grooves pressed into it. In fact, it is one single groove that goes from the outside to the inside. The stylus is placed on the outside and is moved inwards along the groove by the rotation of the record. In order for this to actually work in reality, the tonearm bearing must have extremely low friction. This is despite the tonearm cables running through the tonearm tube and connecting the headshell to the turntable’s phono output.
At this point the tonearm should be raised, which brings us straight to the next topic.
Tonearm lift / Cue lever
Of course you can place the stylus on the record by hand. Depending on your fine motor skills and the number of drinks, this works sometimes better and sometimes worse, but in the long run it will ruin your records by scratching them. The turntable manufacturers have come up with a great tool for this: the tonearm lift. It raises the tonearm so that the cartridge hovers safely above the record. After placing the stylus over the desired location on the record, just lower the arm with the lift and the stylus slides smoothly into the groove. This pleases the stylus and especially the record. With good tonearms, you can even adjust the speed at which the arm lowers.
Counter weight
At the rear end there is a balance weight that is used to balance the tonearm and thus compensates for the weight (and position) of the headshell. After the tonearm is balanced, the tracking force can be adjusted. In the first step we can set the value from the pickup’s data sheet.
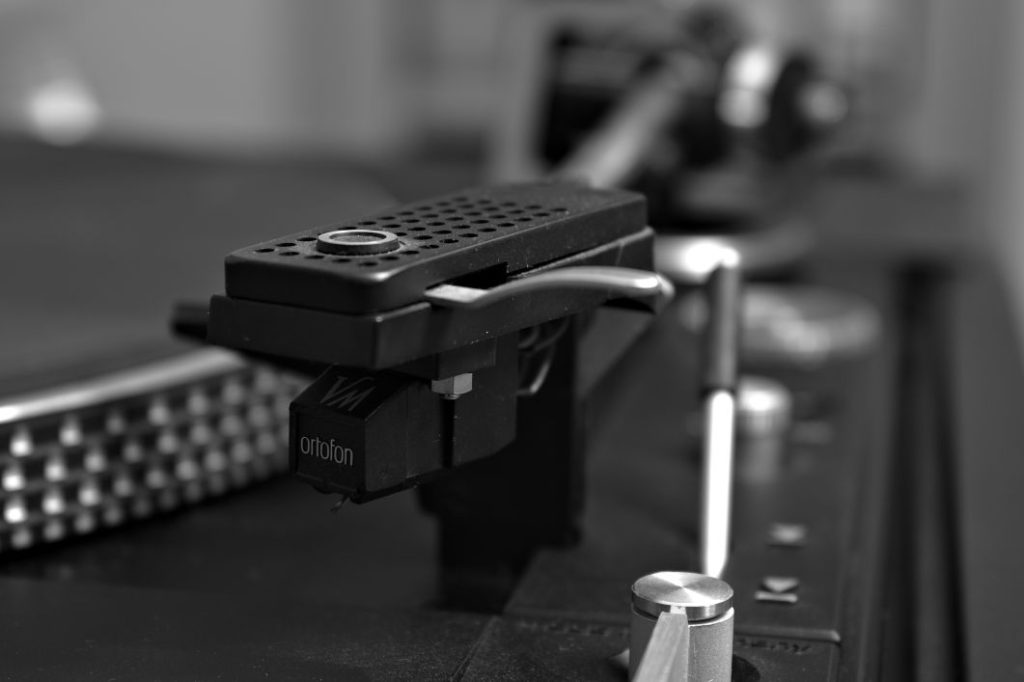
Headshell / Cartridge / Stylus
At the front end of the tonearm is the headshell, which mechanically and electrically connects the cartridge to the tonearm. The stylus, which mechanically samples the signal from the groove, is part of the cartridge. Within the cartridge, this mechanical signal is converted into an electrical signal via coils and magnets. There are essentially two principles for this: the stylus moves the coils and the magnets are stationary, which is called moving coil or MC for short. The other way around, the stylus moves the magnets and the coils are stationary. This principle is called a moving magnet or, accordingly, MM. Visually, the stylus and the cartridge certainly make up the smallest part of the turntable anatomy. However, in my experience, these two parts have the biggest impact on the fidelity of a turntable. In this article we look at the topic in more detail. A very powerful tool for reducing distortion is adjusting the cartridge’s offset and overhang. However, this topic is so extensive that I don’t go into further detail here. To play a record, we leave it at this point to place the needle above the groove of the record (the tonearm is still raised).
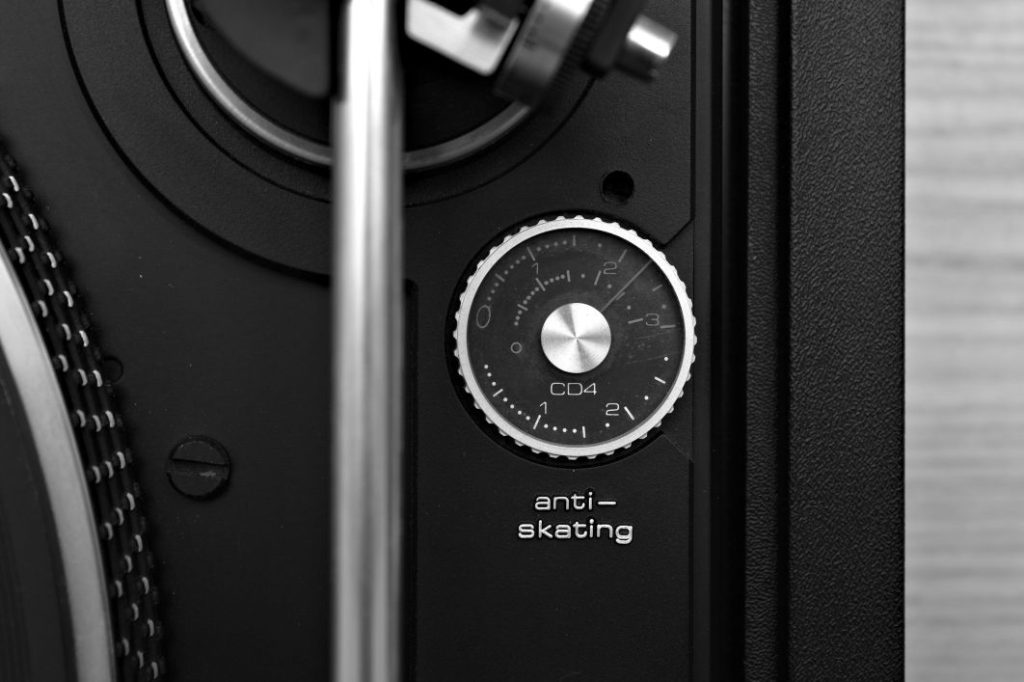
Anti-Skating adjustment
Since this setting is not crucial for playing a record for the first time, just this much at this point: When sliding through the groove, a force acts on the stylus in the direction of the groove at the point of contact with the stylus. Since the tonearm can only absorb forces along its axis (we remember the low friction that the bearing must have), the result is a force towards the center of the record. This causes the stylus to “stick” to the inner edge of the groove, which can be at least partially compensated for by the anti-skating force. For a deep dive, read this article.
Do the dance…
If you’ve made it this far, I’d like to congratulate you. Not only did you learn a lot about the anatomy of a turntable but also about the background of the components. To celebrate this properly, we can now lower the tonearm, let the stylus run into the groove and make ourselves comfortable. With all the components working together, you should now melt away with the wonderful sound of your favorite record. On the other hand, if your hair stands on end because the sound reminds you of a croaking announcement at the main train station, don’t worry. We’ll cover this in my other articles about the possibilities of turntable adjustment.